Table of Contents
1 Introduction: Understanding the Benefits of Car Window Tinting
Car window tinting is more than just a style statement; it offers numerous advantages beyond aesthetics. As we delve into this step-by-step guide, you’ll learn how to apply car window tinting like professional, reaping benefits such as enhanced privacy, protection against harmful UV rays, and a cooler and more comfortable interior.
2 Step 1: Assemble the Essential Tools and Materials
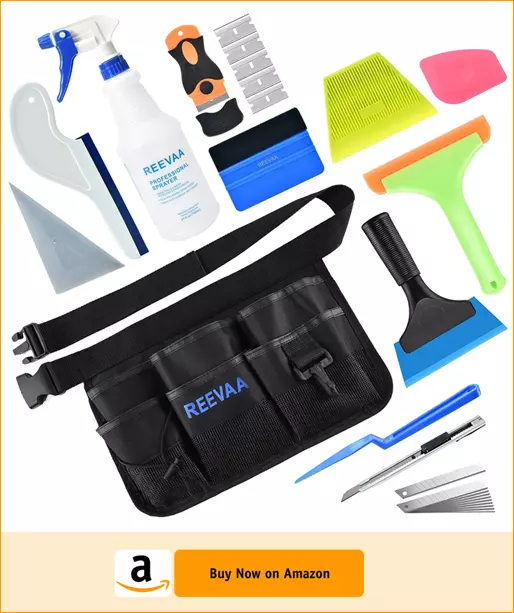
Before embarking on the exciting journey of applying car window tinting, ensure you have all the essential tools and materials within arm’s reach. These tools form the backbone of your window tinting endeavor, pivotal in achieving professional-quality results. With the right equipment, you’ll be well-prepared to execute each step seamlessly and precisely.
Start with the foundation: high-quality window tint film. This film not only enhances your vehicle’s aesthetics but also provides vital benefits such as privacy and protection against harmful UV rays. Choosing the right tint film that suits both your preferences and complies with your local regulations is crucial.
During the application process, you’ll use a spray bottle with water and mild soap. This simple yet effective mixture is fundamental to the wet application method, allowing for proper placement and repositioning of the tint film while minimizing the risk of adhesive damage.
A squeegee, equipped with a felt or soft rubber edge, is essential for ensuring a smooth and bubble-free application. It removes excess water and air trapped between the tint film and the window glass, maintaining a polished finish.
Precision in cutting the window tint film is key, and for that, a sharp utility knife is your go-to tool. This utility knife allows you to achieve clean and accurate cuts, ensuring the film fits perfectly and aligns precisely with the edges of the glass.
Incorporating a heat gun or hairdryer into the process serves a dual purpose. Emitting controlled heat, these tools make the tint film more pliable, helping smooth out any wrinkles or bubbles that may form during application.
This particular step is crucial for an impeccable outcome. Having all the necessary tools and materials readies you to start the exciting process of applying car window tinting. These tools act as your allies, assisting you in achieving the desired results with precision and confidence.
It’s important to remember that investing in high-quality tools and taking your time during this phase significantly contributes to the success of your window tinting project. So gather your supplies, prepare your workspace, and get ready to transform your car’s windows like a true professional.
3 Step 2: Prepare Your Car Windows for Tinting
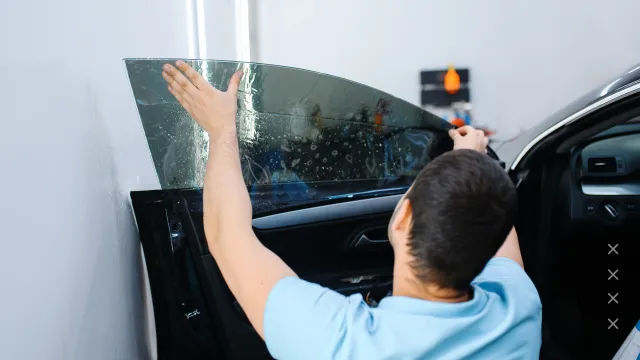
Preparation is the cornerstone of any successful window tinting project, laying the foundation for impeccable results that enhance both the appearance and functionality of your vehicle.
Begin by thoroughly cleaning your car windows. Use a window cleaning solution that is non-toxic and non-abrasive. This solution is designed to break down and lift dirt, grime, and residue from the surface of the glass. With a soft and lint-free microfiber cloth, meticulously clean each window to ensure they’re free from smudges, fingerprints, or contaminants.
Creating an immaculate surface is crucial for proper adhesion. The cleaner your windows, the better the tint film will adhere, minimizing the risk of imperfections. Pay special attention to corners and edges, creating the perfect canvas for the tint film to bond seamlessly.
Precision plays a vital role in window tinting, and outlining your windows with masking tape is a game-changing technique. By carefully applying masking tape along the edges of the windows, you create a visual guide that ensures accuracy during the application process.
The benefits of thorough preparation are significant. Cleaning and outlining your windows with masking tape might seem like small steps, but they lay the foundation for a smoother application, reducing errors and contributing to the overall professionalism of the finished result. A clean window surface acts as the ideal canvas for the tint film, promoting better adhesion and a more flawless application. Masking tape serves as a safeguard against uneven application, allowing you to focus on achieving a flawless finish.
By dedicating time to preparing your car windows, you’re showcasing a commitment to excellence that will be evident in the final outcome. With clean, well-outlined windows, you’re ready to embark on the exciting journey of applying the window tint film, knowing you’ve set the stage for success.
4 Step 3: Measure and Cut the Window Tint Film
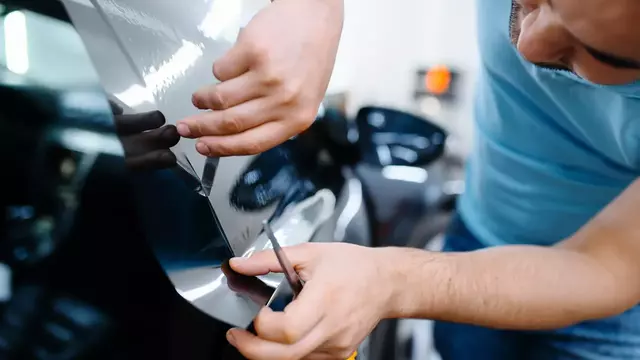
Precision is the heart of window tinting, and this phase is where precision truly shines. Accurate measurements and clean cuts are the foundation of a flawless window tint application. By adhering to these principles, you’re ensuring the tint film fits seamlessly on your car’s windows, creating a sleek appearance that’s both visually appealing and functional.
Begin by measuring each window carefully. A tape measure is essential for obtaining the exact dimensions of the glass surface you plan to tint. It’s vital to measure the height and width, as well as any irregularities such as curves or corners. Remember, accuracy is key. To guarantee complete coverage and a smooth application, allow for a slight overlap while cutting the tint film.
For this task, a cutting mat and sharp utility knife are indispensable. The cutting mat provides a stable and safe surface, while the sharp utility knife ensures clean, straight cuts without jagged edges. As you cut, apply gentle pressure to avoid tearing or damaging the film.
Technique matters when it comes to precision cutting. Consider utilizing the “top-down” or “bottom-up” approach. With the top-down method, you attach the top edge of the film to the window’s top and then gradually roll down the film, cutting and smoothing it as you go. Conversely, the bottom-up method starts with the bottom edge and works upwards. These techniques help maintain straight lines and reduce the risk of errors.
Clean cuts go beyond aesthetics; they ensure the film fits snugly against the window, eliminating gaps or overruns. A well-cut film enhances the adhesive’s ability to bond uniformly, promoting a smoother application process. Moreover, precise cuts prevent unnecessary wastage of tint film, maximizing the use of your materials.
Devoting attention to the measurement and cutting phase sets the stage for a successful window tinting project. The time invested in accurate measurements and precise cutting techniques demonstrates your commitment to quality. Armed with perfectly sized tint film pieces, you’re now prepared to proceed with the application phase, confident in your meticulous efforts leading to outstanding results.
5 Step 4: Apply the Window Tint Film to Your Car Windows
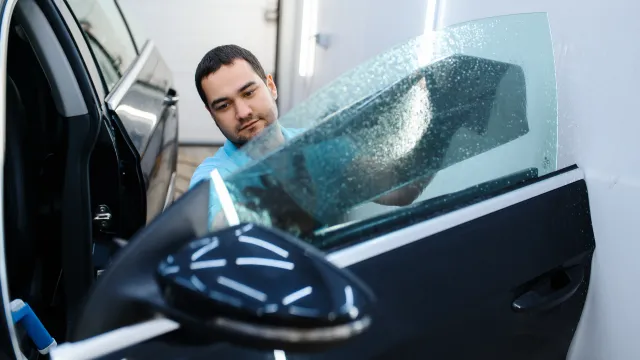
As you enter the core of the window tinting process, mastering the art of application is crucial for achieving a professional finish. How you apply the tint film determines the clarity, smoothness, and longevity of the result. Two primary methods—wet application and dry application—offer distinct advantages that contribute to an impeccable outcome.
The wet application method involves using a mixture of water and mild soap to create a lubricated surface on the window. Start by spritzing the window with the water-soap solution, ensuring even coverage. As you position the tint film onto the wet surface, you’ll have the advantage of repositioning the film to achieve perfect alignment. This flexibility minimizes the risk of errors and promotes a smoother overall application. As you squeegee out excess water and air bubbles, the film adheres gradually, leaving you with a clean and professional look.
In contrast, the dry application method involves applying the tint film directly to the dry window surface. This approach requires precision and careful alignment from the outset. As you lay the film onto the window, use the squeegee to press it in place, working from the center outward. The lack of water and soap means less repositioning flexibility, making accurate placement from the start crucial. However, the dry method can yield faster results, as the film adheres more rapidly without drying time.
Regardless of the method you choose, the squeegee plays a pivotal role in achieving a smooth and uniform application. As you position the tint film, glide the squeegee gently across the surface, starting from the center and moving outward. This technique helps remove trapped air bubbles and excess water, ensuring the film adheres seamlessly to the window.
The decision between wet and dry application methods often hinges on your experience level and personal preferences. For newcomers to window tinting, the wet method’s repositioning flexibility can be forgiving. However, with practice, the dry method can yield equally impressive results. Regardless of the chosen method, consistent use of the squeegee is essential. Its role in creating a smooth, bubble-free surface is paramount.
As you complete this step, your windows transform into sleek canvases combining style and function. The application phase is where your patience, precision, and dedication to detail truly shine, laying the foundation for a professionally executed window tint that enhances your vehicle’s aesthetics and value.
6 Step 5: Remove Air Bubbles and Smooth Out the Tint Film
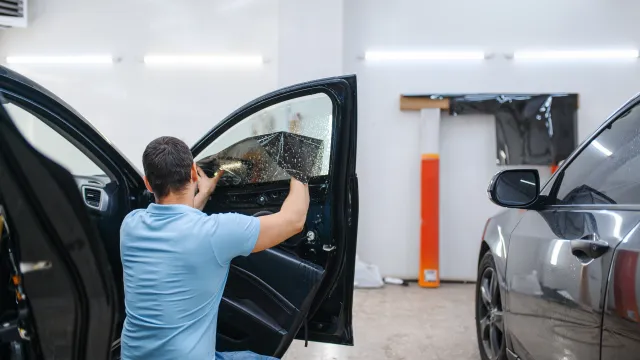
Achieving a flawless finish involves more than just the initial application; it’s also about refining the details. As you progress with your window tinting project, you might encounter persistent air bubbles and wrinkles that can detract from the overall appearance of your tinted windows. Fear not; this step outlines the process of addressing these imperfections to achieve that coveted professional look.
Despite your best efforts during the application phase, air bubbles and wrinkles can sometimes appear beneath the tint film. These common imperfections can compromise the visual appeal of your tinted windows. However, armed with the right approach and tools, you can effectively banish them.
A gentle application of heat can be your secret weapon against air bubbles and wrinkles. A heat gun or a hairdryer set on low heat is your ally. Begin by maintaining a few inches of distance between the heat source and the tint film. Move the heat source in a sweeping motion, ensuring an even distribution of heat across the affected area. As the film warms up, the adhesive becomes more pliable, allowing you to manipulate the film and smooth out inconsistencies.
As the film warms and the adhesive softens, use your fingertips or a soft cloth to gently press down on the film, starting from the center of the bubble or wrinkle and working outward. The combination of heat and gentle pressure will encourage the film to adhere smoothly to the glass, effectively eliminating imperfections.
Patience and gradual progress are essential in this step. Avoid rushing the process; allow the adhesive to respond to the heat gradually. Applying excessive heat or pressure in one go can potentially damage the film or the glass. Instead, take your time, observe the progress, and adjust your approach as needed.
The art of smoothing out air bubbles and wrinkles with the heat gun or hairdryer technique empowers you to control the final appearance of your tinted windows. As you address these imperfections, you’re not only enhancing aesthetics; you’re also refining the quality of your craftsmanship. Keep in mind that perfection is achieved gradually, and your diligence in addressing imperfections speaks volumes about your commitment to excellence.
With air bubbles and wrinkles eliminated, your tinted windows now bear the hallmark of a professional touch. The next time you gaze out of your sleek, flawless windows, you’ll be reminded of the transformative power of attention to detail. As you continue, carry this dedication to refinement into the final steps of your window tinting journey.
7 Step 6: Trim Excess Film and Clean Up Any Residue
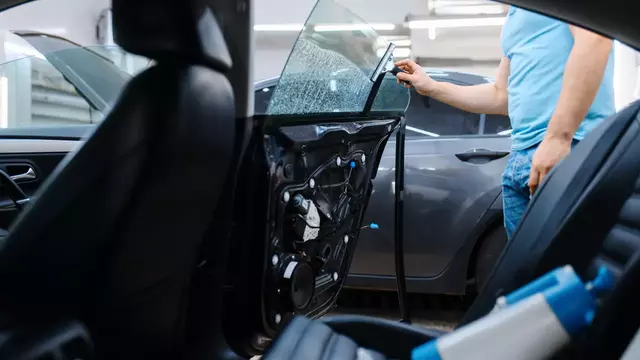
With the majority of the window tinting process behind you, you’re now in the final stretch of achieving a flawless and professional-looking result. This step focuses on the finishing touches that elevate your car’s windows into showcases of your DIY skills. By expertly trimming excess film and meticulously cleaning any adhesive residue, you’re adding the final strokes to your window tinting masterpiece.
Trimming excess film requires precision and finesse. After applying the tint film, you’ll likely have a margin of excess film along the edges of the window. Armed with a sharp utility knife, gently and methodically trim away this excess film. To ensure a clean and uniform edge, follow the outline of the window’s frame. Take your time and make deliberate, controlled cuts to achieve the desired result.
Clean edges are essential for a polished appearance. Neatly trimmed edges not only enhance the overall look of your tinted windows but also reduce the risk of peeling or lifting over time. A seamless transition from the tint film to the glass surface is the hallmark of a professional-grade window tinting job.
As you remove the excess film, you might encounter adhesive residue on the window’s surface. This is a normal part of the process. Tackling it with care and the right tools is essential. A microfiber cloth, along with a mild cleaning solution, is your secret weapon. Gently dampen the cloth and softly rub away the residue. The mild solution helps break down the adhesive without damaging the tint film or the glass.
Meticulousness is your best friend during this step. Ensure all edges are uniformly trimmed and free from excess film. Take the time to examine the window’s surface for any adhesive residue, paying extra attention to corners and crevices. A thorough clean ensures your windows shine with a pristine finish, free from remnants of the application process.
As you complete this step, you’re bringing your window tinting project to a close with finesse and precision. The expertly trimmed edges and the absence of adhesive residue are a testament to your commitment to achieving the highest standards. The result is a set of windows that don’t just reflect your DIY skills but also showcase a level of professionalism that’s bound to impress.
With excess film trimmed and residue banished, step back and admire your handiwork. Your windows are now a statement of style showcasing your meticulous craftsmanship. The journey of applying car window tinting like a pro is nearing its end, and your satisfaction with the outcome is the ultimate reward for your dedication and effort.
8 FAQs About Car Window Tinting
Q1: Is car window tinting legal?
A: Car window tinting laws vary by location. It’s essential to research your local regulations to ensure you comply with legal limits for tint darkness.
Q2: Can I tint my windows on my own?
A: Yes, you can. This guide provides a comprehensive overview of the process. However, if you’re unsure or lack experience, seeking professional help is a viable option.
Q3: How long does the window tinting process take?
A: The time required depends on your experience level and the number of windows. It can range from a few hours to a full day for beginners.
9 Conclusion
Following this comprehensive guide, you’ve acquired the skills to master car window tinting like a professional. Beyond elevating your car’s appearance, you’ve embraced the benefits of UV protection, privacy enhancement, and improved interior comfort. Remember that practice makes perfect, and patience is your ally during the tinting process. If you’re ever uncertain, professional assistance is always a valuable resource. As you apply these steps and techniques, you’re well on your way to enjoying the rewards of expertly applied car window tinting.
In the end, you’re not just tinting windows; you’re enhancing your driving experience in a vehicle that’s both stylish and functional. So, gear up, gather your materials, and transform your car’s windows into a testament to your DIY prowess.


